

Introduction
Tired of serving the same ordinary apple pie that never quite matches the ones from your favorite bakery? We’ve all been there – spending hours in the kitchen only to end up with a soggy bottom crust, bland filling, or a lackluster presentation that leaves your guests reaching for the ice cream to compensate.
But what if you could transform your homemade apple pie into a show-stopping dessert that not only looks professional but tastes like it came straight from an artisanal bakery? With just a few clever techniques and ingredient upgrades, your apple pie can go from basic to breathtaking without requiring professional pastry skills.
As a pastry chef with over 15 years of experience perfecting apple pie recipes for high-end restaurants and bakeries, I’ve discovered that the difference between an average apple pie and an exceptional one often comes down to just a handful of simple but powerful adjustments. These game-changing techniques have helped thousands of home bakers elevate their apple pies from forgettable to unforgettable.
In this guide, I’ll share five professional methods to transform your apple pie, including selecting the perfect apple varieties, creating a foolproof flaky crust, enhancing your filling with unexpected flavor boosters, mastering decorative techniques that impress, and pairing your pie with complementary accompaniments that complete the experience.
Why This Apple Pie Recipe Works
- Uses a combination of apple varieties for complex flavor and texture balance
- Incorporates a special crust technique that guarantees flakiness every time
- Features a pre-cooking method that prevents the dreaded “gap” between filling and crust
- Includes unexpected flavor enhancers that amplify the natural sweetness of apples
- Provides both classic and creative decoration options to match any occasion
- Offers make-ahead components for stress-free entertaining
Choosing the Right Apples
Best Apple Varieties for Pie
The secret to exceptional apple pie begins with choosing the right apples. Unlike other desserts where a single fruit variety works best, the most impressive apple pies actually use a strategic combination of varieties:
- Granny Smith: These tart, firm apples hold their shape during baking and provide the necessary acidity to balance the sweetness of your pie. I recommend making these about 50% of your apple mixture.
- Honeycrisp: With their perfect balance of sweetness and tartness, these provide incredible flavor and a satisfying texture that doesn’t turn to mush. Use these for about 25% of your mix.
- Braeburn or Pink Lady: These add complexity with their wine-like notes and maintain their structure beautifully during baking. These should make up the remaining 25%.
Using this combination creates a much more interesting flavor profile than any single variety could provide, with varying textures that make each bite slightly different from the last.
Buying Tips
When selecting apples for your pie:
- Choose firm, heavy apples with no soft spots or wrinkled skin
- Look for a fresh, fruity aroma when you smell near the stem
- Select medium-sized apples rather than enormous ones, as they tend to have more concentrated flavor
- Seek out local, in-season apples when possible for superior flavor (fall apples typically have better flavor complexity)
Substitutions
If you can’t find the recommended varieties:
- For Granny Smith: Cortland or Crispin apples provide similar tartness
- For Honeycrisp: Jonagold or Braeburn offer comparable sweetness with good structure
- For specialty apples: Northern Spy, Winesap, or Baldwin varieties work wonderfully if you can find them
Avoid Red Delicious, Gala, and Fuji apples for baking, as they tend to become mealy and lack the necessary acidity for balanced flavor.
Ingredients & Prep
Apple Prep Essentials
The way you prepare your apples significantly impacts the final texture and flavor of your pie:
- Peeling Technique: Use a sharp Y-peeler and work in circular motions around the apple. While some recipes call for leaving peels on, they can create an inconsistent texture in classic apple pie.
- Slicing Consistency: Cut apples into uniform 1/4-inch slices rather than chunks. This consistent thickness ensures even cooking and creates beautiful layered patterns when the pie is sliced.
- Pre-Treatment: Toss sliced apples with 1 tablespoon of lemon juice immediately after cutting to prevent browning and add brightness.
- Pre-Cooking Method: This is game-changer #1 – Briefly sauté your sliced apples with butter for 5-7 minutes before filling your pie. This pre-cooking step releases moisture that would otherwise make your bottom crust soggy, and it prevents that frustrating gap between your filling and top crust that appears when raw apples shrink during baking.
Crust Enhancement
For a truly spectacular apple pie, upgrade your crust with these professional touches:
- Butter AND Shortening: Use a combination of 70% unsalted butter (for flavor) and 30% shortening (for flakiness).
- Cold Ingredients: Ensure all ingredients are very cold, including the flour (15 minutes in the freezer before use).
- Secret Ingredient: Add 1 tablespoon of apple cider vinegar to your ice water. The acidity prevents gluten development, resulting in a more tender crust.
- Lamination Technique: This is game-changer #2 – After your initial dough is formed, use a simple folding technique (similar to rough puff pastry) by folding the dough in thirds like a letter, turning 90 degrees, and repeating twice more. This creates multiple butter layers for exceptional flakiness.
Filling Flavor Enhancers
Elevate your apple pie filling with these unexpected ingredients:
- Primary Ingredients:
- 6-7 cups mixed apple varieties, peeled and sliced
- 3/4 cup granulated sugar
- 2 tablespoons all-purpose flour
- 1 tablespoon cornstarch
- 1 teaspoon ground cinnamon
- 1/4 teaspoon ground nutmeg
- 1/4 teaspoon salt
- 2 tablespoons butter
- Secret Enhancers: This is game-changer #3
- 2 tablespoons boiled apple cider or apple cider reduction
- 1/2 teaspoon orange zest
- 1 tablespoon calvados or apple brandy (optional)
- 1/4 teaspoon almond extract
- Pinch of black pepper (enhances all other flavors)
The combination of boiled cider and apple brandy intensifies the natural apple flavor, while the almond extract creates depth and the black pepper heightens all other flavors without adding noticeable heat.
Step-by-Step Cooking Instructions
Pre-Cooking Prep
- Prepare your enhanced pie dough and refrigerate for at least 1 hour.
- Peel, core, and slice apples to 1/4-inch thickness.
- Preheat your oven to 425°F with a baking sheet on the middle rack.
- Roll out the bottom crust to 12 inches in diameter and fit into a 9-inch pie plate, trimming edges to a 1-inch overhang.
- Refrigerate the lined pie plate while preparing the filling.
Filling Preparation
- In a spacious skillet, melt 2 tablespoons of butter over medium heat.
- Add sliced apples and sauté for 5-7 minutes until they just begin to soften but still hold their shape.
- Take off the heat and allow it to cool for 10 minutes.
- In a large bowl, combine sugar, flour, cornstarch, spices, salt, boiled cider, zest, brandy, and extracts.
- Add the cooled apples and gently toss until coated.
Assembly and Baking
- Stretch the top crust to a diameter of 11 inches.
- Game-changer #4 – Brush the rim of the bottom crust with egg wash before adding filling, which creates a better seal.
- Pour the filling into the chilled bottom crust, mounding slightly in the center.
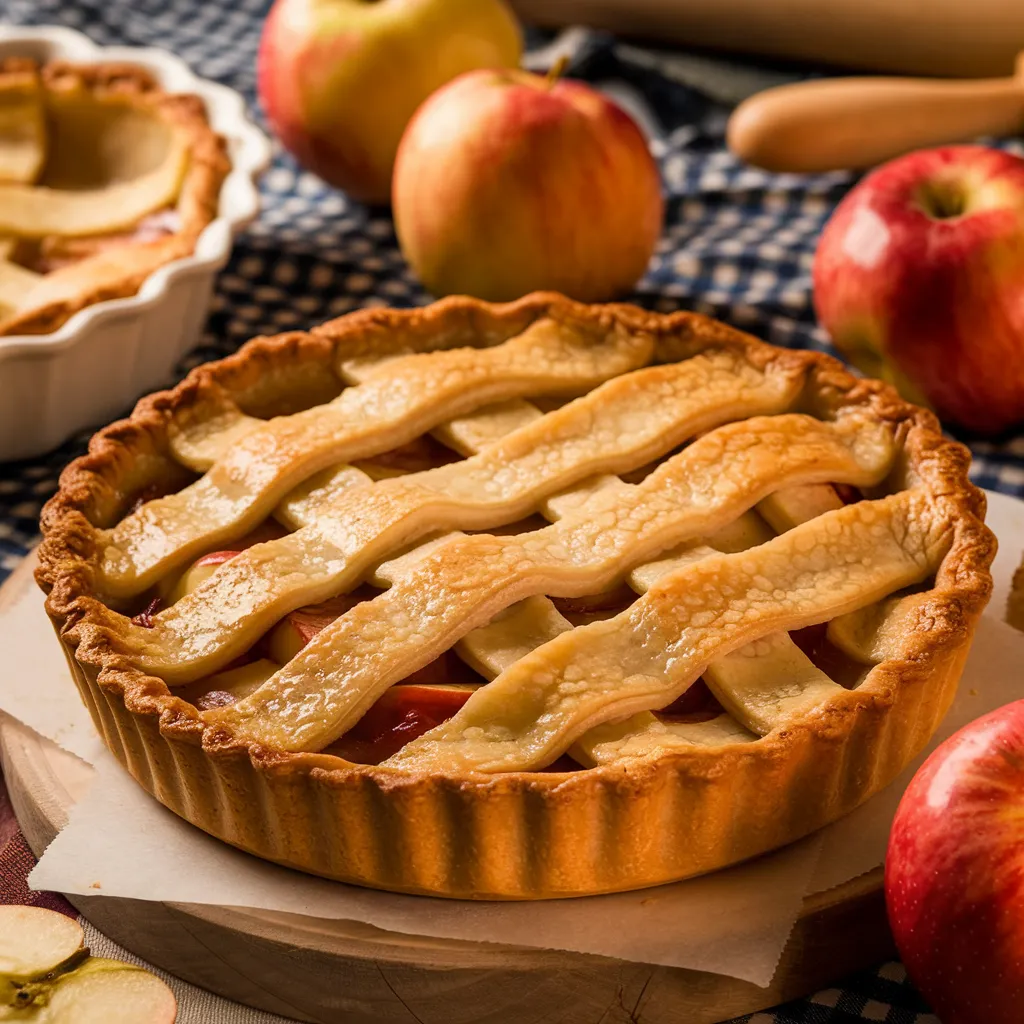
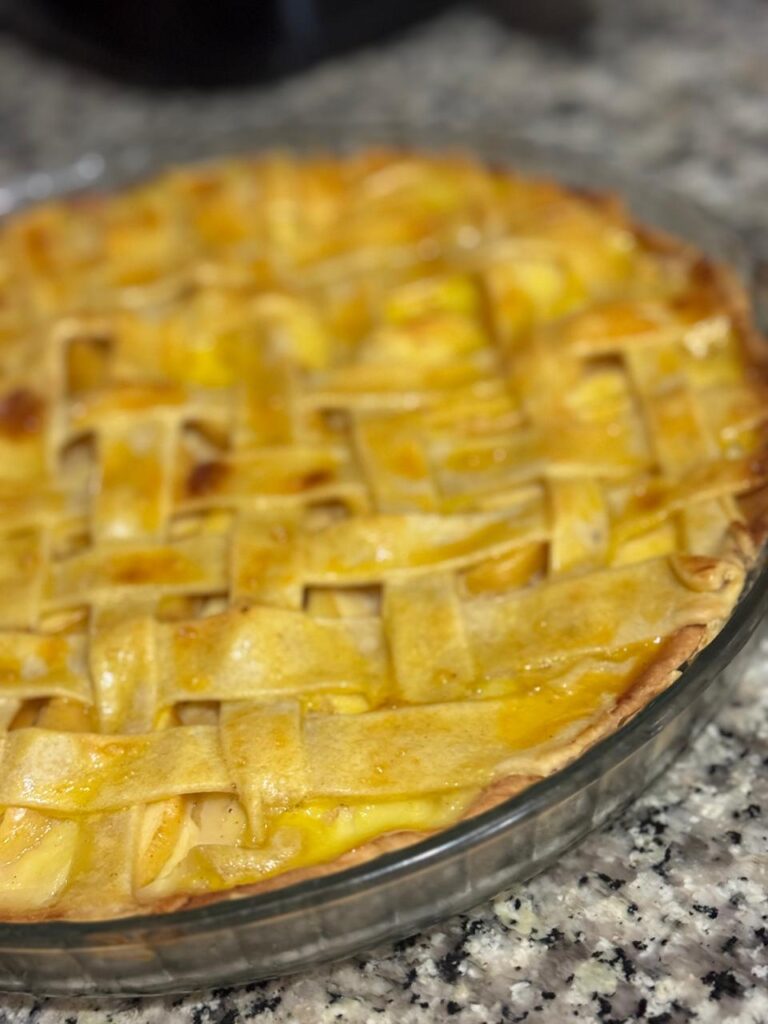
- Apply the top crust (traditional, lattice, or decorative) and trim excess to match the bottom overhang.
- Fold the overhang under itself and crimp decoratively.
- Brush the top with egg wash (1 egg beaten with 1 tablespoon water).
- Sprinkle with coarse sugar for sparkle and crunch.
- Cut vents if using a solid top crust.
Baking Method
- Place pie on the preheated baking sheet (this helps cook the bottom crust).
- Bake at 425°F for 20 minutes.
- Reduce temperature to 375°F and continue baking for 40-45 minutes until golden brown and filling is bubbling.
- If the edges brown too quickly, shield them with aluminum foil or a pie shield.
Cooling and Setting
Game-changer #5 – Allow your pie to cool completely (at least 4 hours) before slicing. This patience will be rewarded with clean, perfect slices where the filling stays intact instead of running all over the plate. For the absolute best texture and flavor, make your pie a day in advance.
Pro Tips for Perfect Apple Pie
Avoiding Common Problems
- Preventing Soggy Bottom: Blind bake your bottom crust for 10 minutes with pie weights before adding filling, or brush with egg white and let dry for 5 minutes.
- Fixing Runny Filling: Add an extra 1/2 tablespoon cornstarch to your filling if your apples are particularly juicy, or if you live in a humid climate.
- Ensuring Even Baking: Rotate your pie halfway through baking time, and use a glass pie plate so you can see when the bottom is properly browned.
Tool Recommendations
- Pie Plate Material: Glass or ceramic pie plates provide the most even baking. Avoid metal pans, which can cause burning.
- Essential Tools:
- Pastry blender for incorporating butter
- Bench scraper for easy dough handling
- Use ceramic pie weights or dried beans for the blind baking process.
- Silicone pie shield to prevent crust edge burning
Storage & Make-Ahead Options
- Dough: Can be refrigerated for 3 days or frozen for 3 months
- Pre-cooked filling: Can be refrigerated for 2 days
- Assembled unbaked pie: Can be frozen for up to 1 month (bake from frozen, adding 15-20 minutes)
- Baked pie: Best within 2 days but keeps for 4 days at room temperature, covered
Flavor Variations
Spiced Caramel Apple Pie
Add a drizzle of homemade or high-quality store-bought caramel sauce to your filling, and increase the warm spices by adding 1/4 teaspoon each of ginger and cardamom. This creates a more complex, dessert-shop worthy flavor profile.
Reduced-Sugar Option
Replace half the granulated sugar with monk fruit sweetener and enhance natural sweetness with 1/4 teaspoon pure stevia extract. Add an extra pinch of salt to compensate for the flavor change.
Global Inspirations
- Dutch Apple Pie: Top with a crumbly streusel made from butter, flour, brown sugar, and cinnamon instead of a traditional top crust.
- French Tarte Tatin Style: Cook your apples in caramelized sugar first, then invert the pie so the apples are on top with the crust underneath.
- English Custard Apple Pie: Pour a mixture of 1 cup heavy cream, 2 eggs, and 1/4 cup sugar over your apples before baking for a custard-infused variation.
Serving Suggestions
An exceptional apple pie deserves thoughtful accompaniments that complement rather than compete with its flavors:
- Classic Pairings:
- Vanilla bean ice cream (the slight floral notes enhance the apple flavor)
- Fresh whipped cream infused with a hint of cinnamon
- Warm salted caramel sauce drizzled over each slice
- Unexpected Complements:
- Sharp cheddar cheese (a traditional pairing in New England)
- Crème fraîche with a touch of maple syrup
- Rosemary-infused honey drizzle
- Beverage Pairings:
- Hot apple cider (echoes and amplifies the pie’s flavors)
- Late harvest Riesling or ice wine
- Spiced chai tea
- Bourbon neat or in a hot toddy
Here is an article link on : Garlin Shrimp Gratin
FAQs
Can I make apple pie with frozen apples?
Yes, but thaw and drain them first, then pat dry with paper towels. Reduce any added liquid in your recipe by about 2 tablespoons, as frozen apples release more mois
Why did my filling pull away from the crust?
This gap occurs when raw apples reduce in volume during baking. The pre-cooking method in this recipe prevents this issue by allowing apples to release moisture and shrink before baking.
How do I fix a pie that’s browning too fast?
Cover the edges with a silicone pie shield or aluminum foil formed into a ring. If the entire top is browning too quickly, tent loosely with foil for the remainder of the baking time.
Can I prepare components of this pie in advance?
Absolutely! The dough can be made up to 3 days ahead and refrigerated, or frozen for 3 months. The filling can be prepared 1-2 days ahead and refrigerated. A fully assembled pie can be frozen unbaked for up to a month.
Conclusion
With these five professional techniques – strategic apple combinations, enhanced crust with lamination, pre-cooking your filling, improved sealing methods, and proper cooling time – you can transform an everyday apple pie into a dessert worthy of centerpiece status at any gathering.
The best part about these upgrades is that none require special equipment or professional training – just a willingness to invest a little extra care into each step of the process. The results speak for themselves in the form of perfectly sliced pieces with flaky, golden crust and a filling that holds its shape while bursting with complex apple flavor.
Ready to impress your family and friends with your elevated apple pie skills? Start with just one or two of these techniques, and you’ll immediately notice the difference. Before long, you’ll be the person everyone asks to bring dessert to every gathering!
For more classic desserts with professional upgrades, check out our Perfect Peach Cobbler or Foolproof Chocolate Soufflé guides next!


Recent Comments