
Introduction
Tired of disappointing homemade donuts that turn out dense, greasy, or lacking that irresistible bakery-fresh quality? Many home bakers struggle to achieve that perfect balance of pillowy interior and golden, crisp exterior that makes professional donuts so craveable.
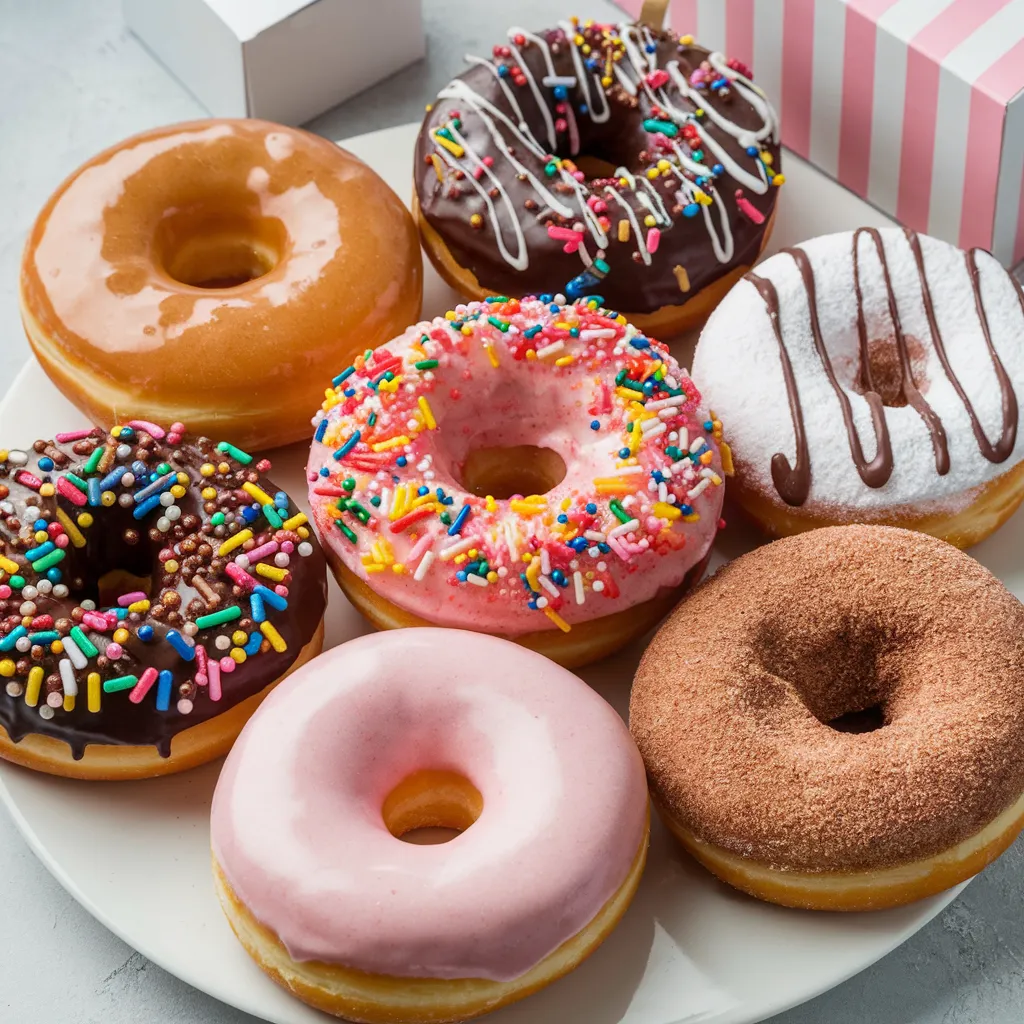
This foolproof donut recipe delivers light, airy rings with a tender crumb and the ideal level of sweetness, finished with a glaze that sets to a perfect sheen without being overly sticky. Whether you prefer classic glazed, chocolate-frosted, or cinnamon sugar, these homemade donuts will rival any gourmet bakery offering—at a fraction of the cost.
As a pastry chef who specialized in breakfast pastries for over a decade and taught donut-making workshops across the country, I’ve distilled the art of perfect donuts into seven manageable steps that guarantee success. I’ve helped thousands of home bakers overcome common pitfalls and master techniques that professionals use daily.
In this comprehensive guide, you’ll discover not only how to create the perfect donut dough but also proper proofing techniques, optimal frying temperatures, and foolproof glazing methods. I’ll also share expert troubleshooting tips, creative flavor variations, and make-ahead strategies to fit this delightful treat into your busy schedule.
Why This Donut Recipe Works
- Creates light, airy donuts with that distinctive professional texture and flavor
- Uses simple ingredients you likely already have in your pantry
- Requires minimal specialized equipment—no donut machine necessary
- Can be prepared in stages to fit your schedule
- Provides techniques that work for both yeast and cake donut variations
- Scales easily from small batches to larger quantities for special occasions
- Includes solutions for common problems like dense texture or greasy finish
Choosing the Right Flour
Best Flour for Perfect Donuts
The foundation of exceptional donuts begins with selecting the right flour. All-purpose flour works, but bread flour creates superior yeast donuts due to its higher protein content (typically 12-14% versus all-purpose’s 10-12%). This higher protein level:
- Develops stronger gluten networks that trap air during proofing and frying
- Creates more defined, airy pockets within the donut’s structure
- Produces a more satisfying chew and tender interior
- Helps donuts maintain their shape during the rising and frying process
For cake donuts, however, all-purpose flour or even cake flour is preferable, resulting in a more tender crumb and delicate texture characteristic of this style.
Buying Tips
Look for unbleached flour for better flavor. King Arthur, Bob’s Red Mill, and other quality brands provide consistent results. If the package doesn’t specifically state protein content, bread flour should be labeled as such, while pastry or cake flour is ideal for cake donut varieties.
Substitutions
If bread flour is unavailable for yeast donuts:
- Use all-purpose flour with 1 tablespoon vital wheat gluten added per cup
- In a pinch, standard all-purpose flour will work, though the texture will be slightly less chewy
- Avoid self-rising flour, which contains leavening agents that will interfere with the yeast
For cake donuts, if you’re using all-purpose flour instead of cake flour, remove 2 tablespoons of flour per cup and replace with 2 tablespoons of cornstarch to lower the protein content.
Ingredients & Prep
Yeast Donut Essential Ingredients
For approximately 12 medium donuts:
- 3½ cups bread flour
- ¼ cup granulated sugar
- 2¼ teaspoons (1 packet) active dry yeast
- 1 teaspoon salt
- 2 large eggs, room temperature
- ¾ cup whole milk, warmed to 110°F (43°C)
- ¼ cup unsalted butter, softened
- 1 teaspoon vanilla extract
- Vegetable or canola oil for frying (approximately 2 quarts)
For the glaze:
- 2 cups powdered sugar
- ¼ cup whole milk
- 1 teaspoon vanilla extract
- Pinch of salt
Dough Preparation Essentials
The method for combining these ingredients is critical for donut success:
Activating the yeast: Begin by proving your yeast in the warm milk with a teaspoon of the sugar until foamy (about 5-10 minutes). This step ensures your yeast is active and gives you the chance to start over if it’s not.
Mixing technique: Combine the dry ingredients first, then gradually incorporate the wet ingredients. For best results, use a stand mixer with a dough hook, mixing on low speed until ingredients are incorporated, then medium speed for 4-5 minutes until the dough is smooth and elastic.
Butter incorporation: Add softened (not melted) butter gradually, in small pieces, while the mixer is running. This creates an enriched dough with even distribution of fat for optimal texture.
Pantry Staples & Equipment
Beyond the ingredients listed above, you’ll need:
- Digital kitchen thermometer (for milk and oil temperature)
- Stand mixer or large mixing bowl if mixing by hand
- Rolling pin
- Donut cutter or two round cutters (one large, one small for the holes)
- Heavy-bottomed pot or Dutch oven for frying
- Slotted spoon or spider strainer
- Cooling rack
- Parchment paper and baking sheets
- Kitchen towels
Step-by-Step Cooking Instructions
Step 1: Prepare the Dough
- In a stand mixer bowl, combine bread flour, sugar (minus 1 teaspoon used for yeast), and salt.
- In a separate bowl, whisk together eggs and vanilla.
- Add the foamy yeast mixture and egg mixture to the dry ingredients.
- Using the dough hook attachment, mix on low speed until roughly combined.
- Increase to medium speed and mix for 4-5 minutes until smooth.
- Add softened butter, a tablespoon at a time, allowing each addition to incorporate fully.
- Continue mixing for another 4-5 minutes until dough is glossy, smooth, and pulls away from the sides of the bowl.
Tip: The dough should be soft but not sticky. If it sticks to your fingers when lightly touched, add flour 1 tablespoon at a time until it reaches the right consistency.
Step 2: First Rise
- Transfer dough to a lightly oiled bowl, turning once to coat.
- Cover with plastic wrap or a damp kitchen towel.
- Let rise in a warm spot (75-80°F/24-27°C) until doubled in size, approximately 1-1½ hours.
- Perform the “finger test”: gently press a finger about ½-inch into the dough. If the indentation remains, the dough is ready.
Temperature matters: If your kitchen is cool, create a warm environment by preheating your oven to its lowest setting for 1-2 minutes, then turning it off and placing the covered dough inside with the door slightly ajar.
Step 3: Shape the Donuts
- Punch down the risen dough gently to release excess air.
- Turn onto a lightly floured surface and roll to ½-inch thickness.
- Using a 3½-inch donut cutter (or round cutters), cut out donuts and holes.
- Gather scraps and re-roll once, but avoid excessive re-rolling which creates tough donuts.
- Place cut donuts and holes on parchment-lined baking sheets, leaving 2 inches between them.
For professional results: Use a sharp cutter and press straight down without twisting, which can seal the edges and prevent proper rising.
Step 4: Second Rise
- Cover shaped donuts loosely with kitchen towels.
- Let rise until puffy and nearly doubled in size, approximately 30-45 minutes.
- The donuts should look light and airy; when touched gently, they should hold a slight indentation.
Critical tip: This second rise is non-negotiable for yeast donuts. It creates the airy, light texture that distinguishes professional donuts from dense, homemade attempts.
Step 5: Fry the Donuts
- During the last 15 minutes of rising, heat oil in a heavy-bottomed pot to 350°F (175°C).
- Line a baking sheet with paper towels and set a cooling rack on top.
- Carefully lift donuts with a spatula or floured fingers and gently lower into the hot oil.
- Fry 2-3 donuts at a time, avoiding overcrowding.
- Cook for 1-2 minutes per side until golden brown.
- Remove with a slotted spoon or spider strainer to the prepared cooling rack.
- Allow to cool slightly before glazing.
Temperature control is crucial: Maintain oil temperature between 350-360°F (175-182°C). Too hot, and donuts will brown too quickly while remaining raw inside; too cool, and they’ll absorb excess oil, becoming greasy.
Step 6: Prepare the Glaze
- While donuts are cooling slightly, whisk together powdered sugar, milk, vanilla, and salt until smooth.
- Adjust consistency as needed—the glaze should be thick enough to coat the back of a spoon but thin enough to drip off slowly.
Timing matters: Prepare the glaze while the donuts are frying or cooling so it’s ready at the optimal glazing moment.
Step 7: Glaze and Finish
- Dip the top half of each slightly warm (not hot) donut into the glaze.
- Lift and allow excess to drip back into the bowl for a few seconds.
- Place glazed-side up on the cooling rack to set.
- For double-glazed donuts, wait until the first layer sets (about 10 minutes), then dip again.
- Add any sprinkles or toppings while the glaze is still wet.
- Allow glaze to set completely before serving or storing.
Perfect timing: Glaze donuts when they’re still slightly warm (but not hot) for the smoothest application. If donuts are too hot, the glaze will become too thin and run off; if too cool, it won’t adhere properly.
Pro Tips for Perfect Donuts
Avoiding Common Mistakes
Dense, Heavy Donuts: Usually caused by under-proofing, overworking the dough, or frying at too low a temperature. Ensure full rises and gentle handling.
Greasy Donuts: Typically results from oil that’s too cool or from frying too many donuts at once, which lowers the oil temperature. Maintain proper oil temperature and fry in small batches.
Tough Texture: Often happens when the dough is overworked, especially when re-rolling scraps too many times. Handle dough gently and minimize re-rolling.
Tool Recommendations
For Dough Preparation:
- Digital kitchen scale for precise measurements
- Instant-read thermometer for checking liquid temperatures
- Bench scraper for handling dough without adding excessive flour
For Frying:
- Heavy-bottomed Dutch oven for even heat distribution
- Clip-on deep-fry thermometer for constant temperature monitoring
- Spider strainer for gentle handling during frying and removal
Storage & Make-Ahead Options
Donuts are best enjoyed fresh, ideally within hours of frying, but you can:
Make Dough Ahead: After the first rise, punch down dough, cover tightly, and refrigerate for up to 12 hours. Allow to come to room temperature for 30 minutes before shaping.
Store Fried Donuts: Keep at room temperature in an airtight container for up to 2 days. Avoid refrigeration, which accelerates staling.
Freeze Unglazed Donuts: Cool completely, wrap individually in plastic wrap, then foil, and freeze for up to 3 months. Thaw at room temperature and warm slightly in a 350°F (175°C) oven for 5 minutes before glazing.
Flavor Variations
Classic Variations
Chocolate Glazed: Replace vanilla in the glaze with 2 tablespoons cocoa powder and increase milk to ⅓ cup.
Cinnamon Sugar: Skip the glaze and toss warm donuts in a mixture of 1 cup granulated sugar and 2 tablespoons ground cinnamon.
Maple Glazed: Substitute pure maple syrup for half the milk in the glaze and add ¼ teaspoon maple extract.
Filled Variations
Boston Cream: Use a paring knife to create a small hole in the side of an unglazed donut. Fill with vanilla pastry cream using a piping bag, then dip in chocolate glaze.
Jelly-Filled: Rather than cutting center holes, leave donuts whole, fry, then fill with your favorite jelly or preserves using a piping bag fitted with a long tip.
Lemon Cream: Fill donuts with lemon curd and finish with a simple powdered sugar glaze or dust with confectioners’ sugar.
Global Inspirations
Italian Bomboloni: Shape into rounds without holes, fill with vanilla custard or Nutella, and dust with powdered sugar.
Spanish Churros: Pipe choux pastry dough into ridged strips, fry until golden, then roll in cinnamon sugar and serve with chocolate dipping sauce.
Polish Pączki: Enrich the dough with additional egg yolks and butter, fill with fruit preserves, and dust with powdered sugar or glaze thinly.
Serving Suggestions
Classic Pairings:
- Hot coffee or espresso
- Cold milk
- Hot chocolate
For Breakfast or Brunch:
- Serve alongside fresh fruit for balance
- Include in a pastry basket with other morning baked goods
- Pair with savory egg dishes to create a sweet-savory contrast
Presentation Ideas:
- Stack on a tiered cake stand for visual impact
- Serve donut holes in small paper bags for a nostalgic touch
- Create a donut board with various glazes and toppings for guests to customize
Here is an article on : Beignets
FAQs
Can I bake these donuts instead of frying them?
While you can bake this dough at 350°F (175°C) for about 12-15 minutes, the result will be more like a sweet roll than a true donut. The characteristic texture of donuts comes from the rapid cooking and crust formation that only frying provides.
Why didn’t my donuts rise properly?
There are several possible reasons:
- Inactive yeast (always test by proofing first)
- Dough too cold during rising
- Over or under-kneading
- Too much flour, creating a stiff dough
Solution: Ensure active yeast, proper dough temperature (75-80°F/24-27°C is ideal), proper kneading (until smooth and elastic), and correct flour measurement (ideally by weight).
Can I make cake donuts with this recipe?
No, cake donuts require a different formula entirely, using chemical leaveners (baking powder/soda) instead of yeast. For cake donuts, you’ll need a batter-like dough with a higher proportion of sugar, eggs, and fat.
How do I know when the oil is the right temperature without a thermometer?
Drop a small piece of donut dough or a donut hole into the oil. It should rise to the surface within a few seconds, surrounded by bubbles, and take about 60 seconds to brown. If it browns too quickly or stays at the bottom too long, adjust your heat accordingly.
What’s the history of donuts?
Fried dough has existed across many cultures for centuries, but the modern donut with a hole is often attributed to American seafarer Captain Hanson Gregory in the mid-1800s. The hole was allegedly created to ensure even cooking, though some historians dispute this colorful tale.
Conclusion
With these seven straightforward steps—preparing the dough, first rise, shaping, second rise, frying, glazing preparation, and finishing—you now have the professional secrets to creating perfect homemade donuts. The combination of quality ingredients, proper technique, and attention to detail transforms a simple fried dough into a bakery-worthy treat.
Heat up your oil and prepare to amaze family and friends with fresh, warm donuts that rival any professional bakery. Join thousands of home bakers who’ve mastered this beloved breakfast treat using these proven techniques.


Recent Comments